
OBS Replay Buffer Not Saving: Troubleshooting Guide
Published
When OBS Replay Buffer is not saving, first separate no file was created from a file was created but is not where you expected. Then test the buffer directly in OBS before diagnosing a keyboard shortcut or a connected app. This avoids reinstalling software to fix a missing save action or an unexpected folder.
Use a short practice session for troubleshooting. Change one thing, save again, and note the result. Do not experiment with an important live session as your only recording. Menu names below follow the English interface of OBS 32; in another version they may differ slightly.
1. Confirm that the buffer is running
Open Settings → Output and confirm Replay Buffer is enabled. Apply the change, then click Start Replay Buffer in the Controls panel. Enabling the feature alone is not the same as starting it. OBS exposes separate start, stop, and save actions.1
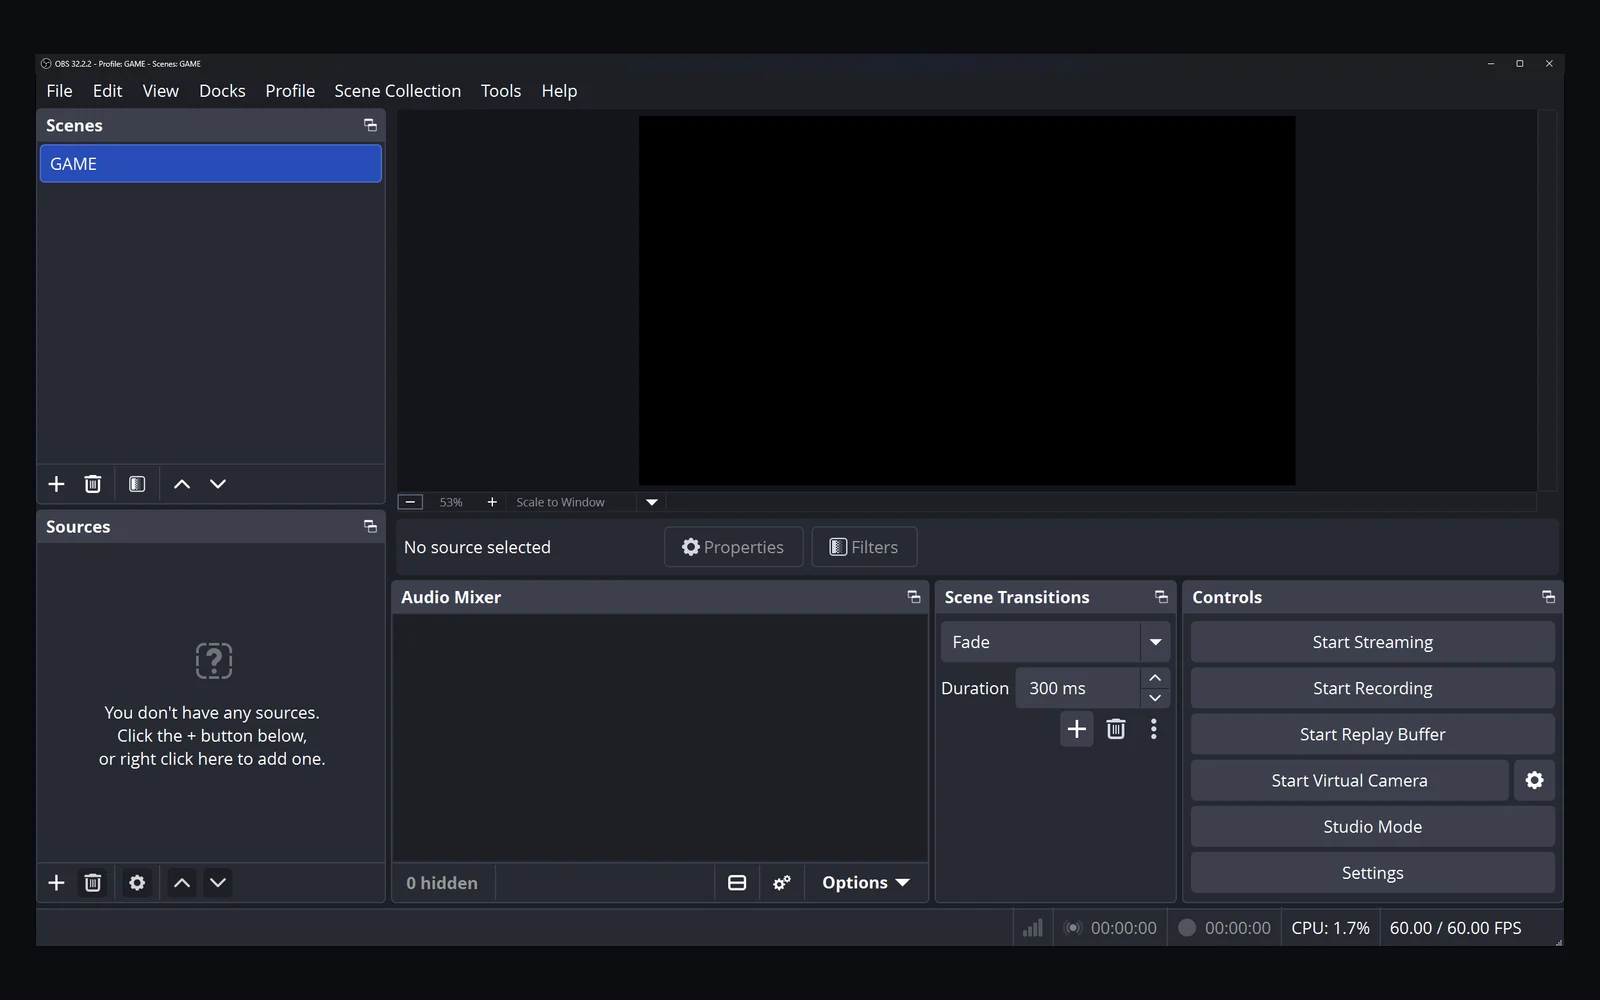
Let some footage accumulate before saving. If OBS was closed when the highlight happened, the buffer cannot reconstruct that earlier gameplay. If your test uses another scene, make sure that scene contains an active video source.
2. Test saving without the game shortcut
Click Save Replay in OBS itself: while the buffer is running, this small button sits next to Stop Replay Buffer in the Controls panel. If a file appears, the recording path and basic buffer operation are working for that test. Focus on the shortcut rather than changing the encoder.
If neither the direct control nor the shortcut creates a file, continue with the folder and recording checks below. If OBS creates the file but Clador Forge does not react, keep those as two different symptoms.
| Test result | Next useful check |
|---|---|
| Direct save works; hotkey fails | Assigned action and conflicting shortcuts |
| Neither method produces a file | Active buffer, destination, and OBS log |
| File exists but seems silent | Audio tracks and playback selection |
| File exists but app has no new clip | Check the app connection, then test the Clador Forge trigger (step 6) |
This table is a diagnostic sequence, not a claim that a single cause explains every failure.
3. Check the actual recording destination
Look at Recording Path under OBS output settings rather than relying on an old desktop shortcut. OBS documents this setting as the recording destination.2 Sort that folder by modification time and save a new test to identify the exact file.
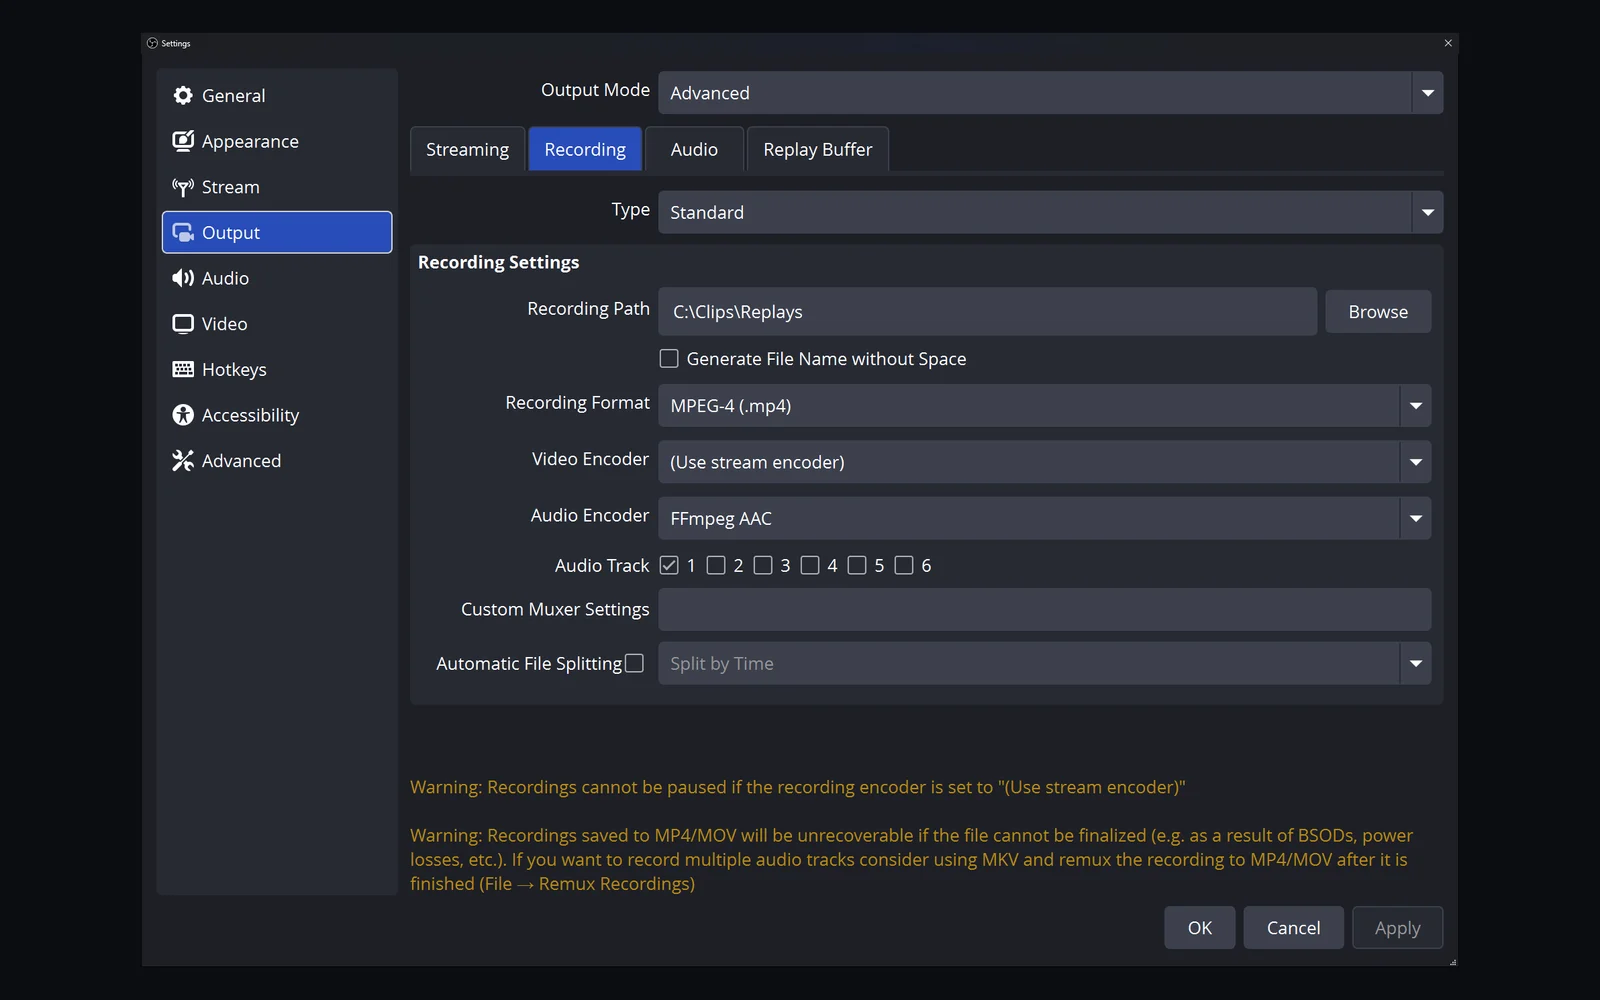
Check free disk space and write access. If the destination is removable, disconnected, or dependent on a sync service, try a local folder you control. Do not delete old captures to troubleshoot before making a backup.
A file that exists but will not open is a different problem from a failed save. Keep the original, try a compatible player, and check whether the format is supported by your editor. Remuxing changes the container; it is not a cure for footage that was never recorded.2
4. Inspect the shortcut separately
In Settings → Hotkeys, confirm you assigned Save Replay, not Start Recording or Stop Replay Buffer. Use an unused test combination. Try it with OBS focused, then with the game focused, and finally during normal movement.
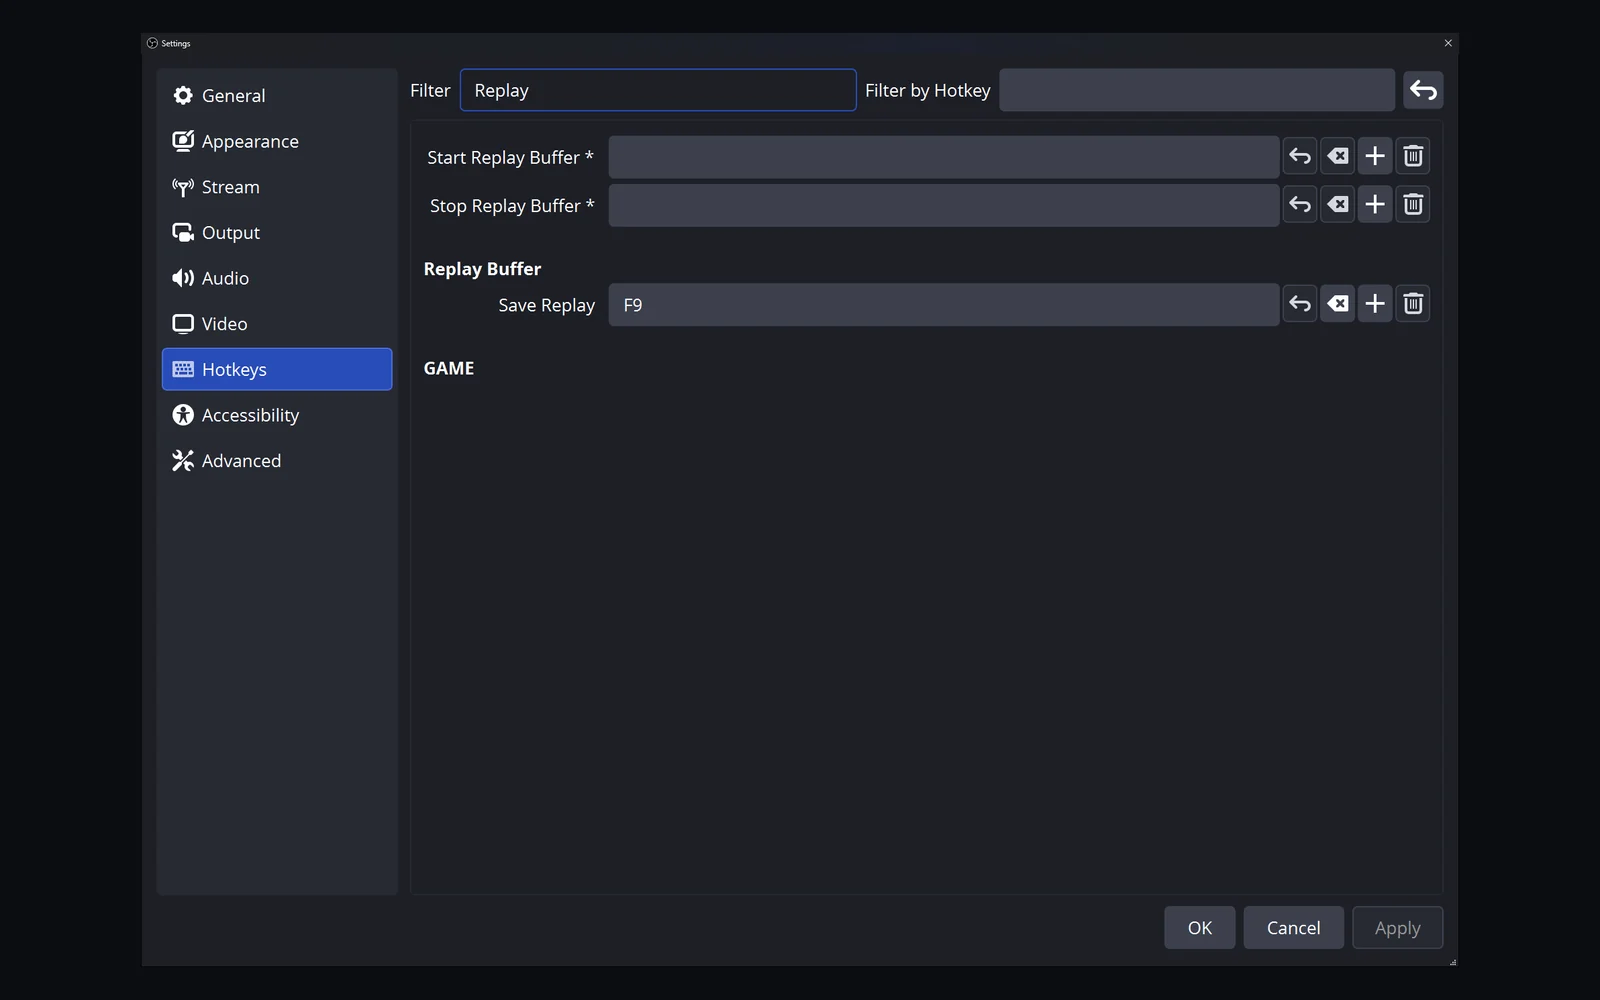
Check whether the same combination is assigned in a keyboard utility, overlay, or another capture application. If the issue occurs only with one game, record that fact. Avoid disabling security software or anti-cheat systems as a generic troubleshooting step.
For a clean setup procedure, see saving gameplay with one hotkey.
5. Reduce load only when the symptom supports it
If the replay is damaged, frozen, or accompanied by encoder warnings, simplify the recording configuration. Test fewer demanding sources or less demanding output settings, then save another practice clip. OBS has a dedicated guide to encoding and rendering load.3
Do not assume that a very large buffer or the highest quality setting will fix saving. First establish a stable short test, then increase the workload gradually.
6. Keep OBS and Clador Forge diagnosis separate
For Clador Forge, check that the app is open and you are signed in. If the app says “OBS is not reachable”, make sure OBS is open and its WebSocket server is turned on. Then run the connection test again in the app's OBS setup step.4
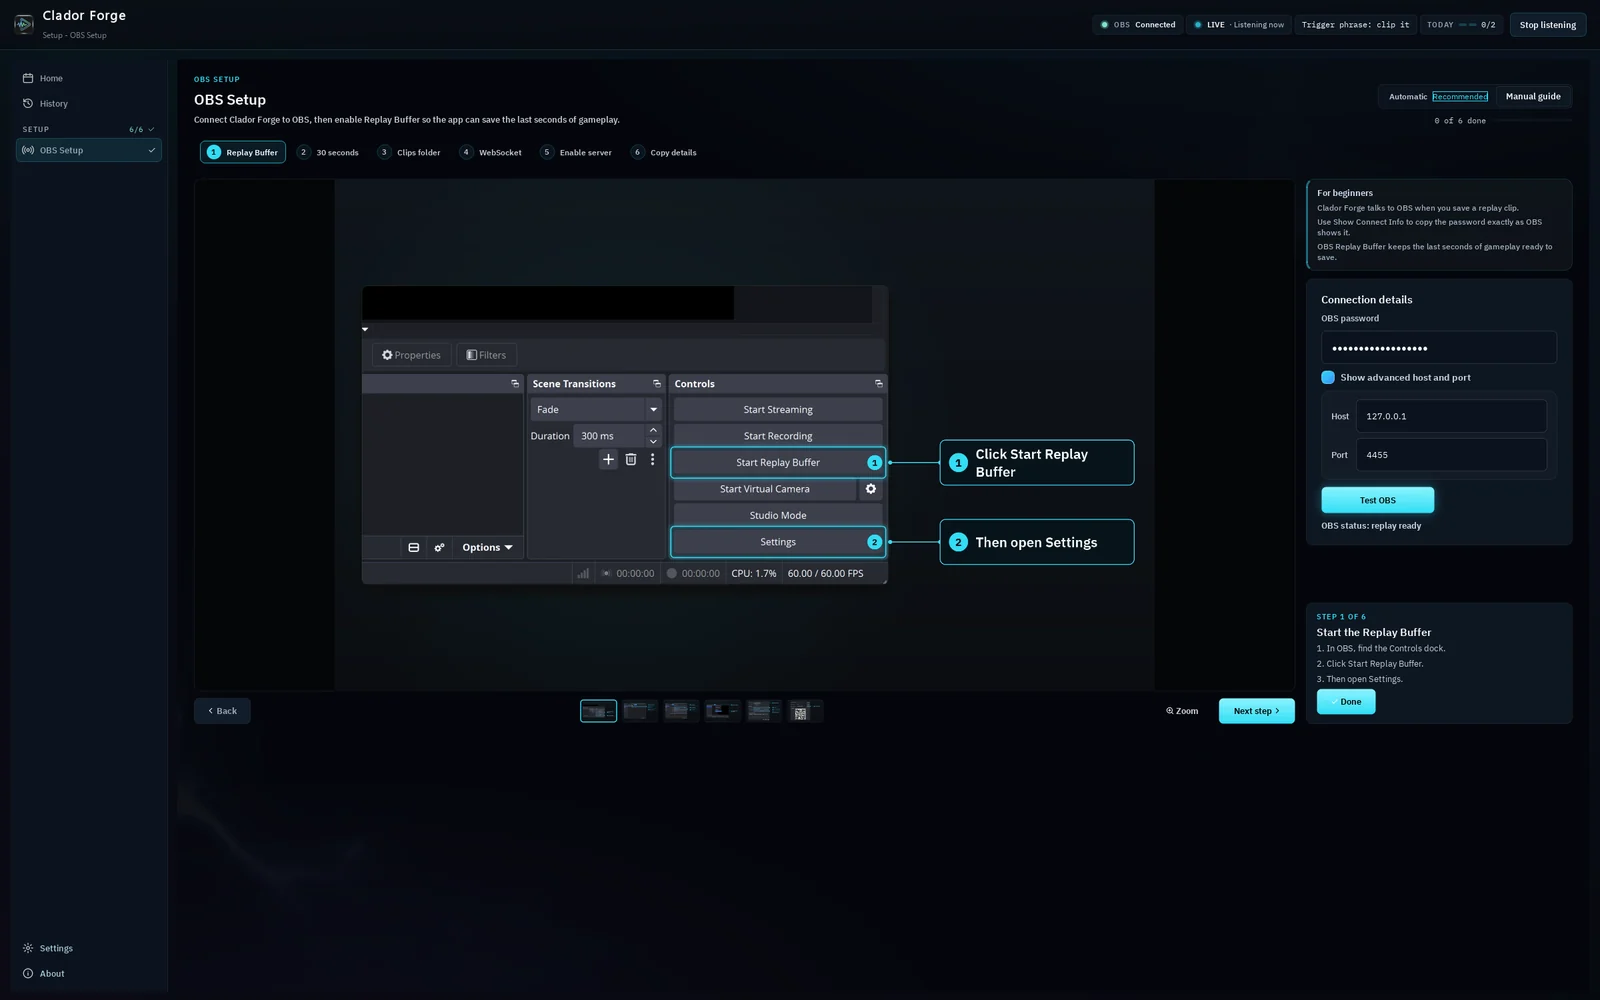
If saving directly in OBS works, keep that test file. Then use the Clador Forge trigger to save a new test moment and check whether a clip appears in the app. These are separate checks: a file saved directly in OBS does not, by itself, confirm that the Clador Forge workflow is working. If no clip appears after using the app's trigger, report which trigger you used, when you used it, where OBS saved the file, and what status or error the app displayed. Do not keep changing OBS recording settings that already passed the direct-save test.
When to collect a log
Reproduce the failure, then use Help → Log Files to select the log from the relevant OBS session. The OBS support instructions distinguish the current log from the previous session's log.5 Review it before sharing: remove private details and never send passwords, tokens, or stream keys.
Include the OBS version, the action used, the expected folder, and whether a direct save worked. Those details are more useful than “Replay Buffer is broken.”
Frequently asked questions
Should I reinstall OBS first?
Not as the first diagnostic step. Check the buffer, action, and file destination first. Back up settings before any reset or reinstall.
The file has video but no microphone. Is that a save failure?
No. The file was created; investigate the audio path using missing audio in OBS replays.
What should I do after fixing it?
Repeat the complete setup test, including an in-game save, before relying on the workflow for a real highlight.